 Domain SearchSecure your perfect Australian domain in seconds
 Web HostingExplore budget-friendly web hosting packages
 cPanel HostingHosting powered by cPanel (The world’s most intuitive control panel)
 Reseller HostingStart your hosting reseller business, without the technical challenges
 Windows HostingOptimised for Windows applications and websites
 Affiliate ProgramGet paid for referring customers to our services
 WordPress HostingHigh-Speed, Optimised WordPress Hosting
 Email HostingSecure business email hosting using your own domain, professional, reliable, and easy to control.
 Domain TransferTransfer your domain with no downtime and complete control
 All DomainsFind and secure domain extensions from around the globe
 Whois LookupCheck domain ownership, expiry dates and registrar details
 .Com DomainSecure the world’s most trusted domain for instant credibility
 AU DomainsGet recognised .au domains made for Australian businesses and people
 SSL CertificateProtect your site with reliable SSL Certificates to safeguard data and build visitor confidence.
 Vps HostingScalable VPS. Complete access. Top-tier speed.
 Managed VPSNot a tech person? Go with our fully managed VPS service.
 Dedicated ServersGet all the power and all the control of your own physical server.
 AI Website BuilderMake professional websites in minutes with AI, no experience needed.
 Online Shop BuilderStart a professional online store. No coding needed.
 Web Design ServiceGet a website designed around your brand and built for your goals.
 BlogBrowse articles on web hosting, online business, digital marketing and other topics
 SupportGet help and instructions for all our services
 ContactConnect with us anytime using chat or email
Are You Ready to Take Control of Your Website’s Performance?
Moving your website to a Virtual Private Server can feel overwhelming, but it doesn’t have to be. We’ve helped thousands of Australian businesses make the switch to VPS hosting, and we’re here to guide you through every step of the process.
Why Australian Businesses Choose VPS Hosting

VPS hosting gives you dedicated resources that shared hosting simply can’t match. You’ll get faster loading speeds, better security, and the ability to handle traffic spikes without your site crashing.
For Australian websites, this means your visitors in Sydney, Melbourne, and Brisbane get lightning-fast page loads. We’ve seen our clients reduce their loading times by up to 60% after switching to our VPS solutions.
What You’ll Need Before Starting
Before you begin the migration process, gather these essential items. Having everything ready will make your transition smooth and stress-free.
Pre-Migration Checklist
| Item | Why You Need It | Where to Find It |
|---|---|---|
| Current hosting login | Access your files and databases | Your existing host’s control panel |
| FTP credentials | Download website files | Hosting account settings |
| Database access | Export your data | cPanel or phpMyAdmin |
| Domain registrar login | Update nameservers | Your domain provider |
| VPS account details | Access your new server | Truehost welcome email |
Understanding VPS Hosting Basics
A VPS is like having your own apartment in a building instead of sharing a single room with strangers. You get dedicated CPU, RAM, and storage that no one else can touch.
At Truehost, We provision our VPS servers in Australian data centres, which means faster speeds for your local audience. This is crucial for SEO rankings since Google considers page speed as a ranking factor.
Step 1: Choose Your VPS Plan

We offer several VPS plans designed for Australian businesses of all sizes. Start by assessing your current website’s resource usage to pick the right plan.
Log into your existing hosting account and check your monthly bandwidth and storage usage. If you’re using more than 70% of your current resources, it’s time to upgrade.
Our Recommended VPS Plans for Australian Sites
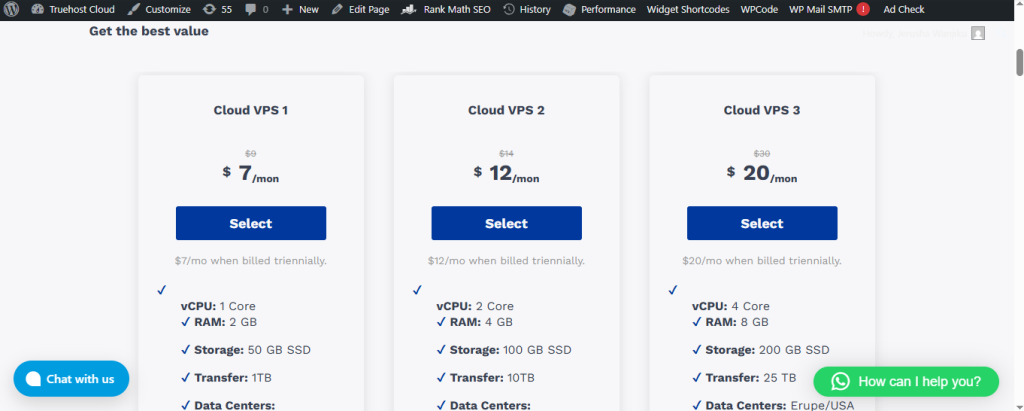
- Starter VPS: Perfect for small business websites (1-2 GB RAM)
- Business VPS: Ideal for growing e-commerce stores (4 GB RAM)
- Professional VPS: Best for high-traffic sites (8 GB+ RAM)
Step 2: Back Up Your Entire Website

Never attempt to migrate your site to web hosting without a complete backup. This is your safety net if anything goes wrong during the transfer.
We recommend creating at least two backups: one on your local computer and another in cloud storage. Download all your website files using FTP or your hosting control panel’s file manager.
How to Create a Complete Backup
- Log into your cPanel or hosting control panel
- Navigate to the backup section
- Click “Download a Full Account Backup”
- Save the file to your computer (this may take 15-30 minutes)
- Upload a copy to Google Drive or Dropbox for extra safety
Step 3: Export Your Database
Your database contains all your website’s content, user data, and settings. Losing this information would be devastating, so we’ll export it carefully.
Access phpMyAdmin through your current hosting control panel. Select your database from the left sidebar, then click the “Export” tab at the top.
Database Export Instructions
Choose the “Quick” export method and “SQL” format for most websites. Click “Go” and save the .sql file to the same folder as your website backup.
For WordPress sites, your database typically has a name starting with “wp_”. Make note of your database name, username, and password—you’ll need these later.
Step 4: Set Up Your New VPS Environment
Log into your Truehost VPS control panel using the credentials we sent you. We’ve already installed the operating system, but you’ll need to configure a few settings.
Most Australian clients choose our cPanel VPS option because it’s familiar and easy to use. If you’re comfortable with command line, our managed VPS plans give you more control.
Initial VPS Configuration
Access your VPS through SSH or the web-based terminal we provide. Update your system packages first by running the necessary commands (we can do this for you if you have a managed plan).
Install a web server, PHP, and MySQL if they’re not already set up. We recommend letting our support team handle this initial configuration—it’s included free with all our VPS plans.
Step 5: Upload Your Website Files
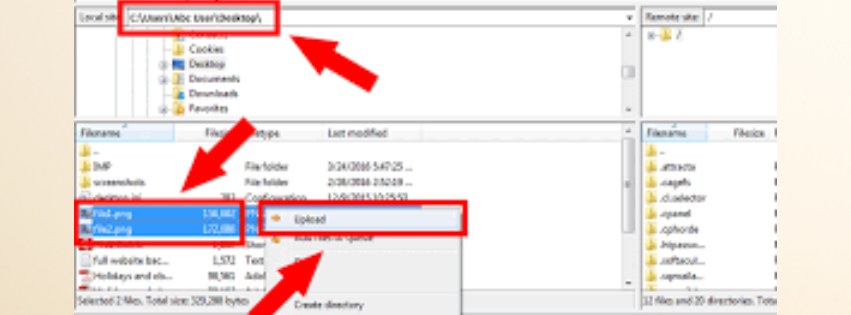
Now it’s time to transfer your website files to your new VPS. We’ll use FTP for this, which is reliable and straightforward.
Download FileZilla (it’s free) and connect to your new VPS using the FTP details from your welcome email. Navigate to the public_html folder on the server—this is where your website files go.
FTP Upload Process
Drag and drop your website files from your local backup folder to the public_html directory. For a typical WordPress site with 2-3 GB of files, this takes about 20-40 minutes depending on your internet speed.
Don’t close FileZilla until all files show as “transferred successfully”. We’ve seen migrations fail because clients closed the program too early.
Step 6: Import Your Database
Create a new database on your VPS through cPanel or phpMyAdmin. Give it the same name as your old database to make things simpler (though this isn’t mandatory).
Open phpMyAdmin on your new VPS and select your newly created database. Click the “Import” tab, choose your .sql backup file, and click “Go”.
Troubleshooting Database Imports
If you see timeout errors during import, your database file might be too large. Contact us and we’ll increase your phpMyAdmin upload limit or import it manually for you.
Make sure you create a database user with full privileges. Your website needs permission to read and write to the database.
Step 7: Update Your Configuration Files
Your website’s configuration file needs to know about your new database details. For WordPress, this file is called wp-config.php.
Use the file manager in cPanel or an FTP client to edit wp-config.php. Update the database name, username, password, and host to match your new VPS settings.
Common Configuration Changes
DB_NAME: Your new database name
DB_USER: Your new database username
DB_PASSWORD: Your new database password
DB_HOST: Usually 'localhost' on VPS
Save the file and close your editor. Your website should now be able to connect to its database on the new server.
Step 8: Test Your Site Before Going Live
Before you point your domain to the new VPS, test everything thoroughly. We provide a temporary URL for every VPS that lets you preview your site.
Check this temporary URL in your Truehost client area. Visit it in your browser and click through your entire website, testing forms, logins, and checkout processes.
Testing Checklist
- Homepage loads correctly
- Internal links work properly
- Images and media files display
- Contact forms send emails
- Search functionality works
- Shopping cart processes test orders
- Admin area is accessible
Step 9: Update Your Domain’s Nameservers
Once you’ve confirmed everything works perfectly, it’s time to point your domain to your new VPS. Log into your domain registrar (where you bought your domain name).
Find the nameserver settings and replace the old nameservers with the ones we provided. This tells the internet to look for your website at its new home.
Our Australian Nameservers
ns1.truehost.com.au
ns2.truehost.com.au
Changes to nameservers take 24-48 hours to spread across the internet (called DNS propagation). During this time, some visitors will see your old site while others see the new one.
Step 10: Monitor the DNS Propagation
Use online DNS checkers to watch your domain’s propagation progress. These tools show you which servers worldwide are pointing to your new VPS.
We recommend checking propagation from multiple Australian locations since that’s where your audience is. Sydney, Melbourne, and Brisbane should update within a few hours.
What to Do During Propagation
Keep both your old and new servers running during this period. Don’t cancel your old hosting account until propagation is 100% complete worldwide.
If visitors make purchases or submit forms, they might go to either server. We can set up database syncing if this is critical for your business.
Step 11: Configure SSL Certificate
Australian consumers expect to see that padlock icon in their browser. We provide free SSL certificates with all our VPS plans through Let’s Encrypt.
Access your cPanel and navigate to the SSL/TLS section. Click “Manage AutoSSL” and enable it for your domain—the certificate installs automatically within minutes.
Forcing HTTPS on Your Site
After your SSL is active, redirect all HTTP traffic to HTTPS. For WordPress sites, install the “Really Simple SSL” plugin and activate it.
Check your website by typing http:// before your domain—it should automatically redirect to https://. This protects your visitors’ data and improves your Google rankings.
Step 12: Optimize Your VPS Performance
Now that you know how to migrate your site to web hosting on a VPS, let’s make it blazing fast. We include performance optimisation tools with every VPS plan.
Install a caching plugin if you’re running WordPress (we recommend LiteSpeed Cache). Enable object caching and set up a CDN to serve images faster to Australian visitors.
Performance Optimization Table
| Optimization | Expected Improvement | Difficulty Level |
|---|---|---|
| Enable caching | 40-60% faster | Easy |
| Compress images | 20-30% faster | Easy |
| Use CDN | 30-50% faster | Medium |
| Enable Gzip | 15-25% faster | Easy |
| Minify CSS/JS | 10-20% faster | Medium |
Step 13: Set Up Automated Backups
Don’t rely on manual backups now that you’re on VPS hosting. We offer automated daily backups that run in the background without affecting your site’s performance.
Configure backup retention based on how frequently your content changes. Most Australian businesses keep 7-30 days of backups for complete peace of mind.
Backup Best Practices
Store backups in multiple locations—we keep them on separate servers in our Australian data centre. Test your backups monthly by restoring them to a staging environment.
Set up email notifications so you know when backups complete successfully. If a backup fails, we’ll alert you immediately so you can investigate.
Step 14: Update Your Email Settings
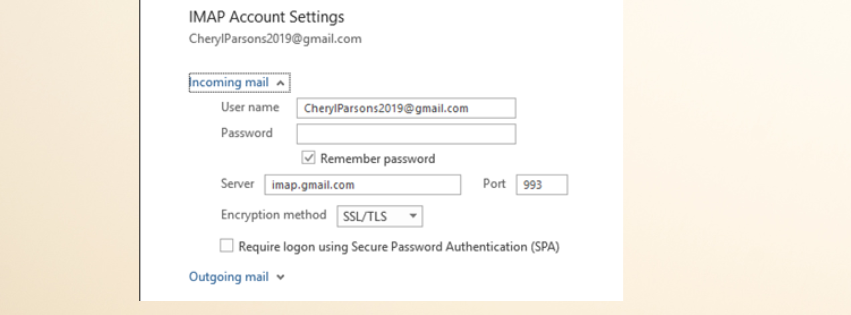
If you host email with your website, you’ll need to configure email accounts on your new VPS. Create the same email addresses you had on your old server.
Update your email client settings (Outlook, Mail, etc.) with the new server details. We provide detailed email configuration guides in your Truehost client area.
Email Migration Options
For businesses with lots of email history, we can migrate your existing emails to the new server. This keeps all your old messages, contacts, and folders intact.
Alternatively, you might consider professional email hosting like Google Workspace or Microsoft 365. Many Australian businesses separate email from web hosting for better reliability.
Step 15: Implement Security Measures
VPS hosting gives you more control, but also more responsibility for security. We’ve configured basic security, but you should add extra layers of protection.
Install a firewall (we pre-configure ConfigServer Firewall on all our VPS plans). Enable automatic security updates so your server stays protected against new threats.
Essential VPS Security Steps
- Change default SSH port from 22 to a custom number
- Disable root login via SSH
- Install fail2ban to block brute force attacks
- Enable ModSecurity web application firewall
- Set up regular malware scanning
Step 16: Monitor Your Site’s Performance
Track your website’s uptime and loading speed using monitoring tools. We provide free uptime monitoring that alerts you if your site goes down.
Set up Google Analytics or similar tools to watch how the migration affected your traffic. You should see improvements in bounce rate and session duration due to faster loading times.
Key Metrics to Watch
Monitor your server resources through cPanel’s resource usage tool. If you’re consistently using over 80% of CPU or RAM, it’s time to upgrade to a larger VPS plan.
We send weekly performance reports showing your bandwidth usage, disk space, and visitor numbers. This helps you plan for growth and avoid running out of resources.
Common Migration Challenges and Solutions
Even when you carefully follow every step, issues can pop up. Here are the problems we see most often with Australian clients and how to fix them.
Database connection errors usually mean incorrect credentials in your configuration file. Double-check that your database name, username, and password match exactly—even one wrong character breaks everything.
Troubleshooting Guide
| Problem | Likely Cause | Quick Fix |
|---|---|---|
| White screen | PHP errors or plugins | Enable error reporting in wp-config.php |
| Missing images | Wrong file paths | Update site URL in database |
| Slow loading | No caching enabled | Install and configure caching plugin |
| Email not working | Wrong mail server settings | Update MX records at domain registrar |
| SSL errors | Certificate not installed | Run AutoSSL in cPanel |
When to Ask for Professional Help
Sometimes it makes sense to let experts handle the migration process. We offer free migration services for all new VPS customers—our team will transfer everything for you.
This is especially valuable for e-commerce sites where downtime costs you money. We schedule migrations during your lowest-traffic hours (usually late at night in Australian time zones).
Our Migration Service Includes
- Complete site and database transfer
- SSL certificate installation
- Email account setup
- Performance optimization
- Post-migration testing and monitoring
Maintaining Your VPS After Migration
Your work doesn’t end once the migration is complete. Regular maintenance keeps your VPS running smoothly and securely.
We handle server-level maintenance (kernel updates, security patches) for you automatically. You’re responsible for keeping your website’s software updated—WordPress core, plugins, and themes should update regularly.
Monthly VPS Maintenance Checklist
Schedule time each month to review your backups, check security logs, and monitor resource usage. This proactive approach prevents problems before they affect your visitors.
Clean up old files and databases that you no longer need. This frees up disk space and keeps your server running efficiently.
How Long Does the Migration Take?
Most Australian websites complete the entire migration process in 4-6 hours spread across a few days. Small WordPress sites with under 5 GB of data can migrate in 2-3 hours.
Large e-commerce sites with thousands of products might take 8-12 hours of active work. Remember that DNS propagation adds 24-48 hours, but this happens automatically in the background.
Timeline Breakdown
- Backup and preparation: 1-2 hours
- File upload: 1-3 hours (depending on site size)
- Database import and configuration: 30 minutes to 1 hour
- Testing and optimization: 1-2 hours
- DNS propagation: 24-48 hours
Cost Comparison: Shared vs VPS Hosting
Australian businesses often worry about VPS hosting costs. While VPS is more expensive than shared hosting, the benefits far outweigh the price difference.
Our VPS plans start at competitive prices that include everything you need. When you factor in better performance, security, and reliability, VPS actually delivers better value for growing businesses.
Value Analysis
| Feature | Shared Hosting | VPS Hosting |
|---|---|---|
| Monthly cost | $5-15 | $25-80 |
| Dedicated resources | No | Yes |
| Loading speed | Slow | Fast |
| Scalability | Limited | Excellent |
| Root access | No | Yes |
| Best for | Small blogs | Growing businesses |
Real Results from Australian Clients
We’ve helped Melbourne-based e-commerce stores handle Black Friday traffic that would have crashed shared hosting. Sydney marketing agencies now load their portfolio sites in under 2 seconds instead of 8.
Brisbane restaurants using online ordering systems report 40% fewer abandoned carts after switching to VPS. The faster checkout experience keeps customers from getting frustrated and leaving.
Your Next Steps
Learning how to migrate your site to web hosting on VPS empowers you to take control of your online presence. You now have the knowledge to make the switch confidently and safely.
We’re here to support Australian businesses every step of the way. Our team is available 24/7 via live chat, email, or phone to answer questions and solve problems.
Ready to Make the Move?
Don’t let technical concerns hold back your website’s potential. Thousands of Australian businesses trust us with their VPS hosting, and we’d love to welcome you to the Truehost family.
Start by choosing the VPS plan that matches your needs, and we’ll handle the heavy lifting. Your faster, more secure website is just a few clicks away.
